Menus
To edit your site menus, in the lefthand sidebar, go to Appearance > Menus.
- Choose a menu from the dropdown toggle list and click the “select” button to bring it up
- You can add pages, posts, custom links and/or categories to your menus. (Open and close those menu using the collapsible arrows)
- Find your post/page, add a link and click “Add to Menu”
- Drag and drop menu items to position them in your menu hierarchy. Child menu items (shown below) will only work for the Primary and Footer menus.
- When your menu is set click “Save Menu”

BirdPress Default Menus
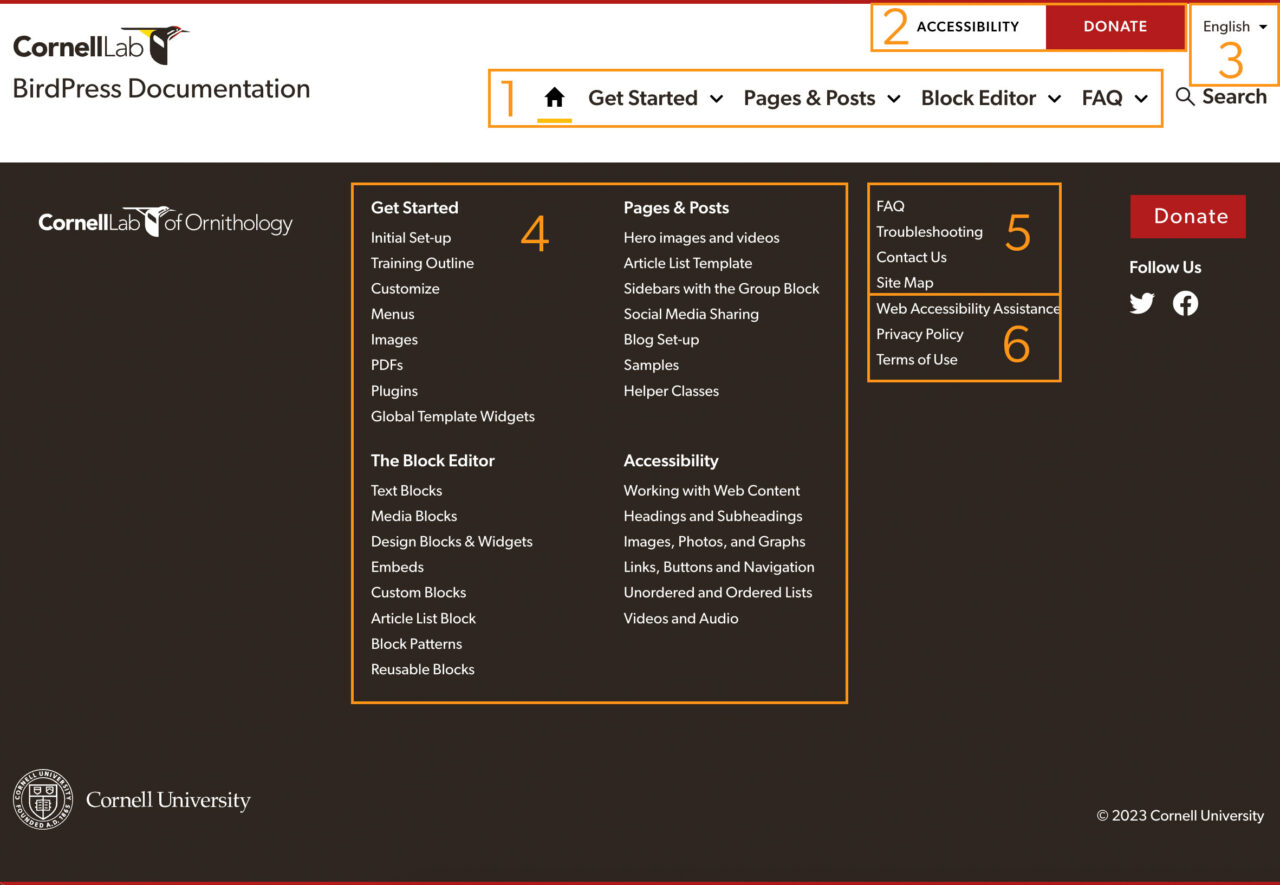
1. Primary Navigation
This is your main site navigation. For usability and site organization purposes, think about the organization of your site(s) based on what labels will make sense to your users. Primary Nav labels should be concise, meaningful, and set the correct user expectation (when a user clicks they are rewarded with content they were expecting).
You can pull in Pages, Posts, categories, and custom links into the Menu Structure and drag the items around to the order you would like for the display.
- You can nest (a) menu item(s) one level under a high level nav item and it (they) will appear in a dropdown menu for that high level nav item
- BUT you can only nest one level down (That’s all we styled for; more levels get unwieldy and become to much of a drill down set up)
This menu is required.
Optional: To get the home icon display on the home link, add the class “home” to the menu item.
2. Tinybar Navigation
Add task-orientated links like contact, sign-up for e-news and donate. Keep in mind that “less is more” and try not to clutter this bar (we find 2-3 items enough).
This menu is optional.
Button: To get the button display on a donate link, add the class “button” to the menu item.
3. Polylang Language Switcher
When Polylang is enabled, we can add the language switcher to the Polylang Language Switcher menu.
4. Footer Navigation
Each top level footer nav item will be the bolded main item of a group. Nesting (an) item(s) underneath a top parent will cause it to appear as a row item in that group. Each group appears in two columns.
5. Contact Navigation
Additional footer menu for contact, sitemap and other misc links.
6. Accessibility / Legal Navigation
This menu is required to appear on all BirdPress websites; it is not editable. For multilingual websites, the names of the links can be edited per language in Polylang strings.
Sub/Secondary Navigation Menus
The subnav is pulled in to display at the top of Pages/Posts. It gives a way to tie a group of pages/posts together and let users jump around between that group.

To create a sub navigation menu:
- In the menu admin screen, click “create a new menu” next to the menu dropdown.
- Name the menu something relevant – usually after the parent page that each page is grouped under. This name shows up on the mobile site for the menu dropdown. You can optionally show this name with the sub nav.
- You can add pages, posts, custom links and/or categories to your menus. (Open and close those menu using the collapsible arrows)
- Find your post/page, add a link and click “Add to Menu”
- Drag and drop menu items to position them in your menu hierarchy.
- When your menu is set click “Save Menu”
- Select the sub navigation on the pages you want it to appear on. See how to select the sub navigation, on Pages & Posts options.
Keep in mind:
- You’ll want to add the page/post you put the menu on to your sub nav group.
- You want to add the subnav menu to all the pages/posts that are part of the subnav group.
- This setup works best for Pages/Posts you want to be in a grouping.
Anchor/Tertiary Navigation Menus
The Anchor Nav offers a nice way to set up a vertical sticky menu on the upper right side of a Page/Post that anchor hot links to key headers/pieces of content on that page.
Anchor navigations require two steps – the creation of the anchor links and the creation of the menu.

To create an anchor link:
- Create a heading or group block that you want to link to
- In the Block Settings sidebar, open the Advanced panel
- Add a relevant HTML anchor, using only alpha characters and dashes (no spaces). For example, the HTML anchor on the heading above this list is “anchor-menu”
To create an anchor navigation menu:
- In the menu admin screen, click “create a new menu” next to the menu dropdown.
- Give your menu a relevant name. The menu name shows up on the mobile version of the website as a menu toggle link.
- On the left sidebar under Add menu items, open the Custom Links panel
- For the link URL, use the anchor name to the heading that contains the HTML anchor. For example the anchor on the heading above this list is #anchor-menu
- In Link Text, add the name of the anchor item – this will show up as the menu text
- When your menu is set click “Save Menu”
- Select the anchor navigation on the page you want it to appear on. See how to select the anchor navigation on Pages & Posts options.
This is an example of a global CTA
Supporting Text for the global CTA